
Ceramic Roll-A-Beast Animal Sculptures
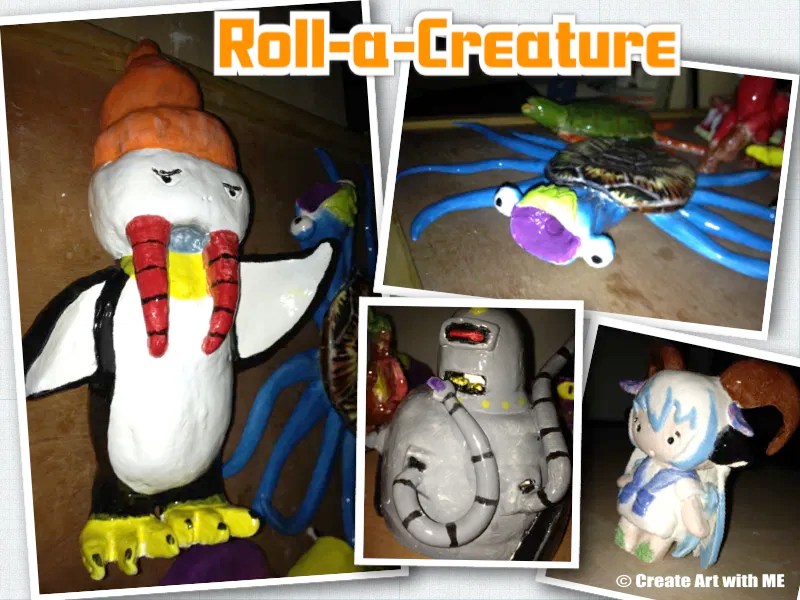 Creating a project that will really stretch your students’ imaginations and challenge their sculpting skills is essential to their creative development! Our Ceramic Roll-A-Beast Animal Sculptures were FUN, creative, and challenging-the students LOVED the whole process!
My HS art class did this project, but it could be modified down through 6th grade (possibly lower grades if you weren’t using ceramics). I developed this idea for the project when my daughter’s science class was studying about animals & how each one is uniquely created! Science & Art are a great combination! Great Biblical integration as well if you need to include that in lesson plans!
Objectives:
• Students will be able to define the given clay vocabulary.
• Students will create an original animal sculpture by combining three body features from different animals to create a new fantasy creature.
• Students will learn pinch pot and slab construction as well as hand building techniques. They will store clay projects properly while under construction.
• Students will demonstrate good craftsmanship using pinch pot, hand-building (slab optional) and glazing techniques.
• Students will draw at least two preparatory sketches of design ideas for their creatures.
Biblical Integration: Creation is God’s Artwork; He is the first creator (Genesis 1-2), Creativity involves the power of choice; it is an indication of freedom, at least within limits. (Encyclopedia of Biblical Truths: Fine Arts & Health by Ruth C. Haycock page 3 & 6
Supplies: Foam Jumbo Playing Dice, sketchbooks or paper, drawing pencils, colored pencils, ceramic supplies (sculpting tools, clay, glazes (optional– acrylic paint instead of glazes)
Delivery & Activity 1: Roll-a-Creature – Developing the Creature
 1. Discuss different anatomy of animals. What are different features that various animals have-mammal, reptile, sea creatures, birds, etc. (Wings/feathers, fangs/tusks, tentacles, fins, scales, fur, horns/antlers, shells, claws, trunks, tails, etc.)
2. Roll-a-Beast Body Features List: Predetermine 6 animal parts that you want to include in the project & assign each part to a number (EX: 1=Wings/feathers, 2=Tentacles, 3=Horns/Antlers, 4=Shell, 5=Fangs/Tusks, 6=Scales ). I kept the list a surprise until everyone had a chance to roll the dice.
3. Have each student roll the dice 3 times so they get 3 unique numbers (roll again if you get a duplicate number). Have the students write down their 3 body parts.
4. After everyone has rolled, display the Roll-a-Beast Body Features list.
5. In their sketchbooks, have them come up with a new creature that incorporates all these parts on it. This will be a fantasy creature, but can look real! I even had one student incorporate the features into a robot-it came out awesome!
6. Use colored pencils to color the design.
Delivery/Activity 2: Ceramics Intro
Clay Building Methods: (For beginning Ceramics: Teacher will demo each technique then have students practice.)
 1. Hand-building: building pots using the only the hands and hand-held clay tools
2. Slab: clay is rolled into thin sheets or slabs and then formed into shapes or forms. (More Slab Ideas)
3. Pinch & Pinch Pot: shaping clay by inserting the thumb of one hand into the clay and lightly pinching/ pressing with the thumb on the inside and fingers on the outside while slowly turning the clay to enlarge the center opening of the clay. (More Pinch Pot Ideas)
4. Coil: creating ceramic forms by rolling out coils of clay and joining them together by the slip & score method.
Stages of Dryness: Wet (Plastic), Leather hard, Greenware or Bone dry, Bisquesware (first firing), GlazeWare (second firing with glaze)
Go over The Ten Golden Rules of Ceramics Submitted by Joe Cox
Activity 3: Construction of Creature
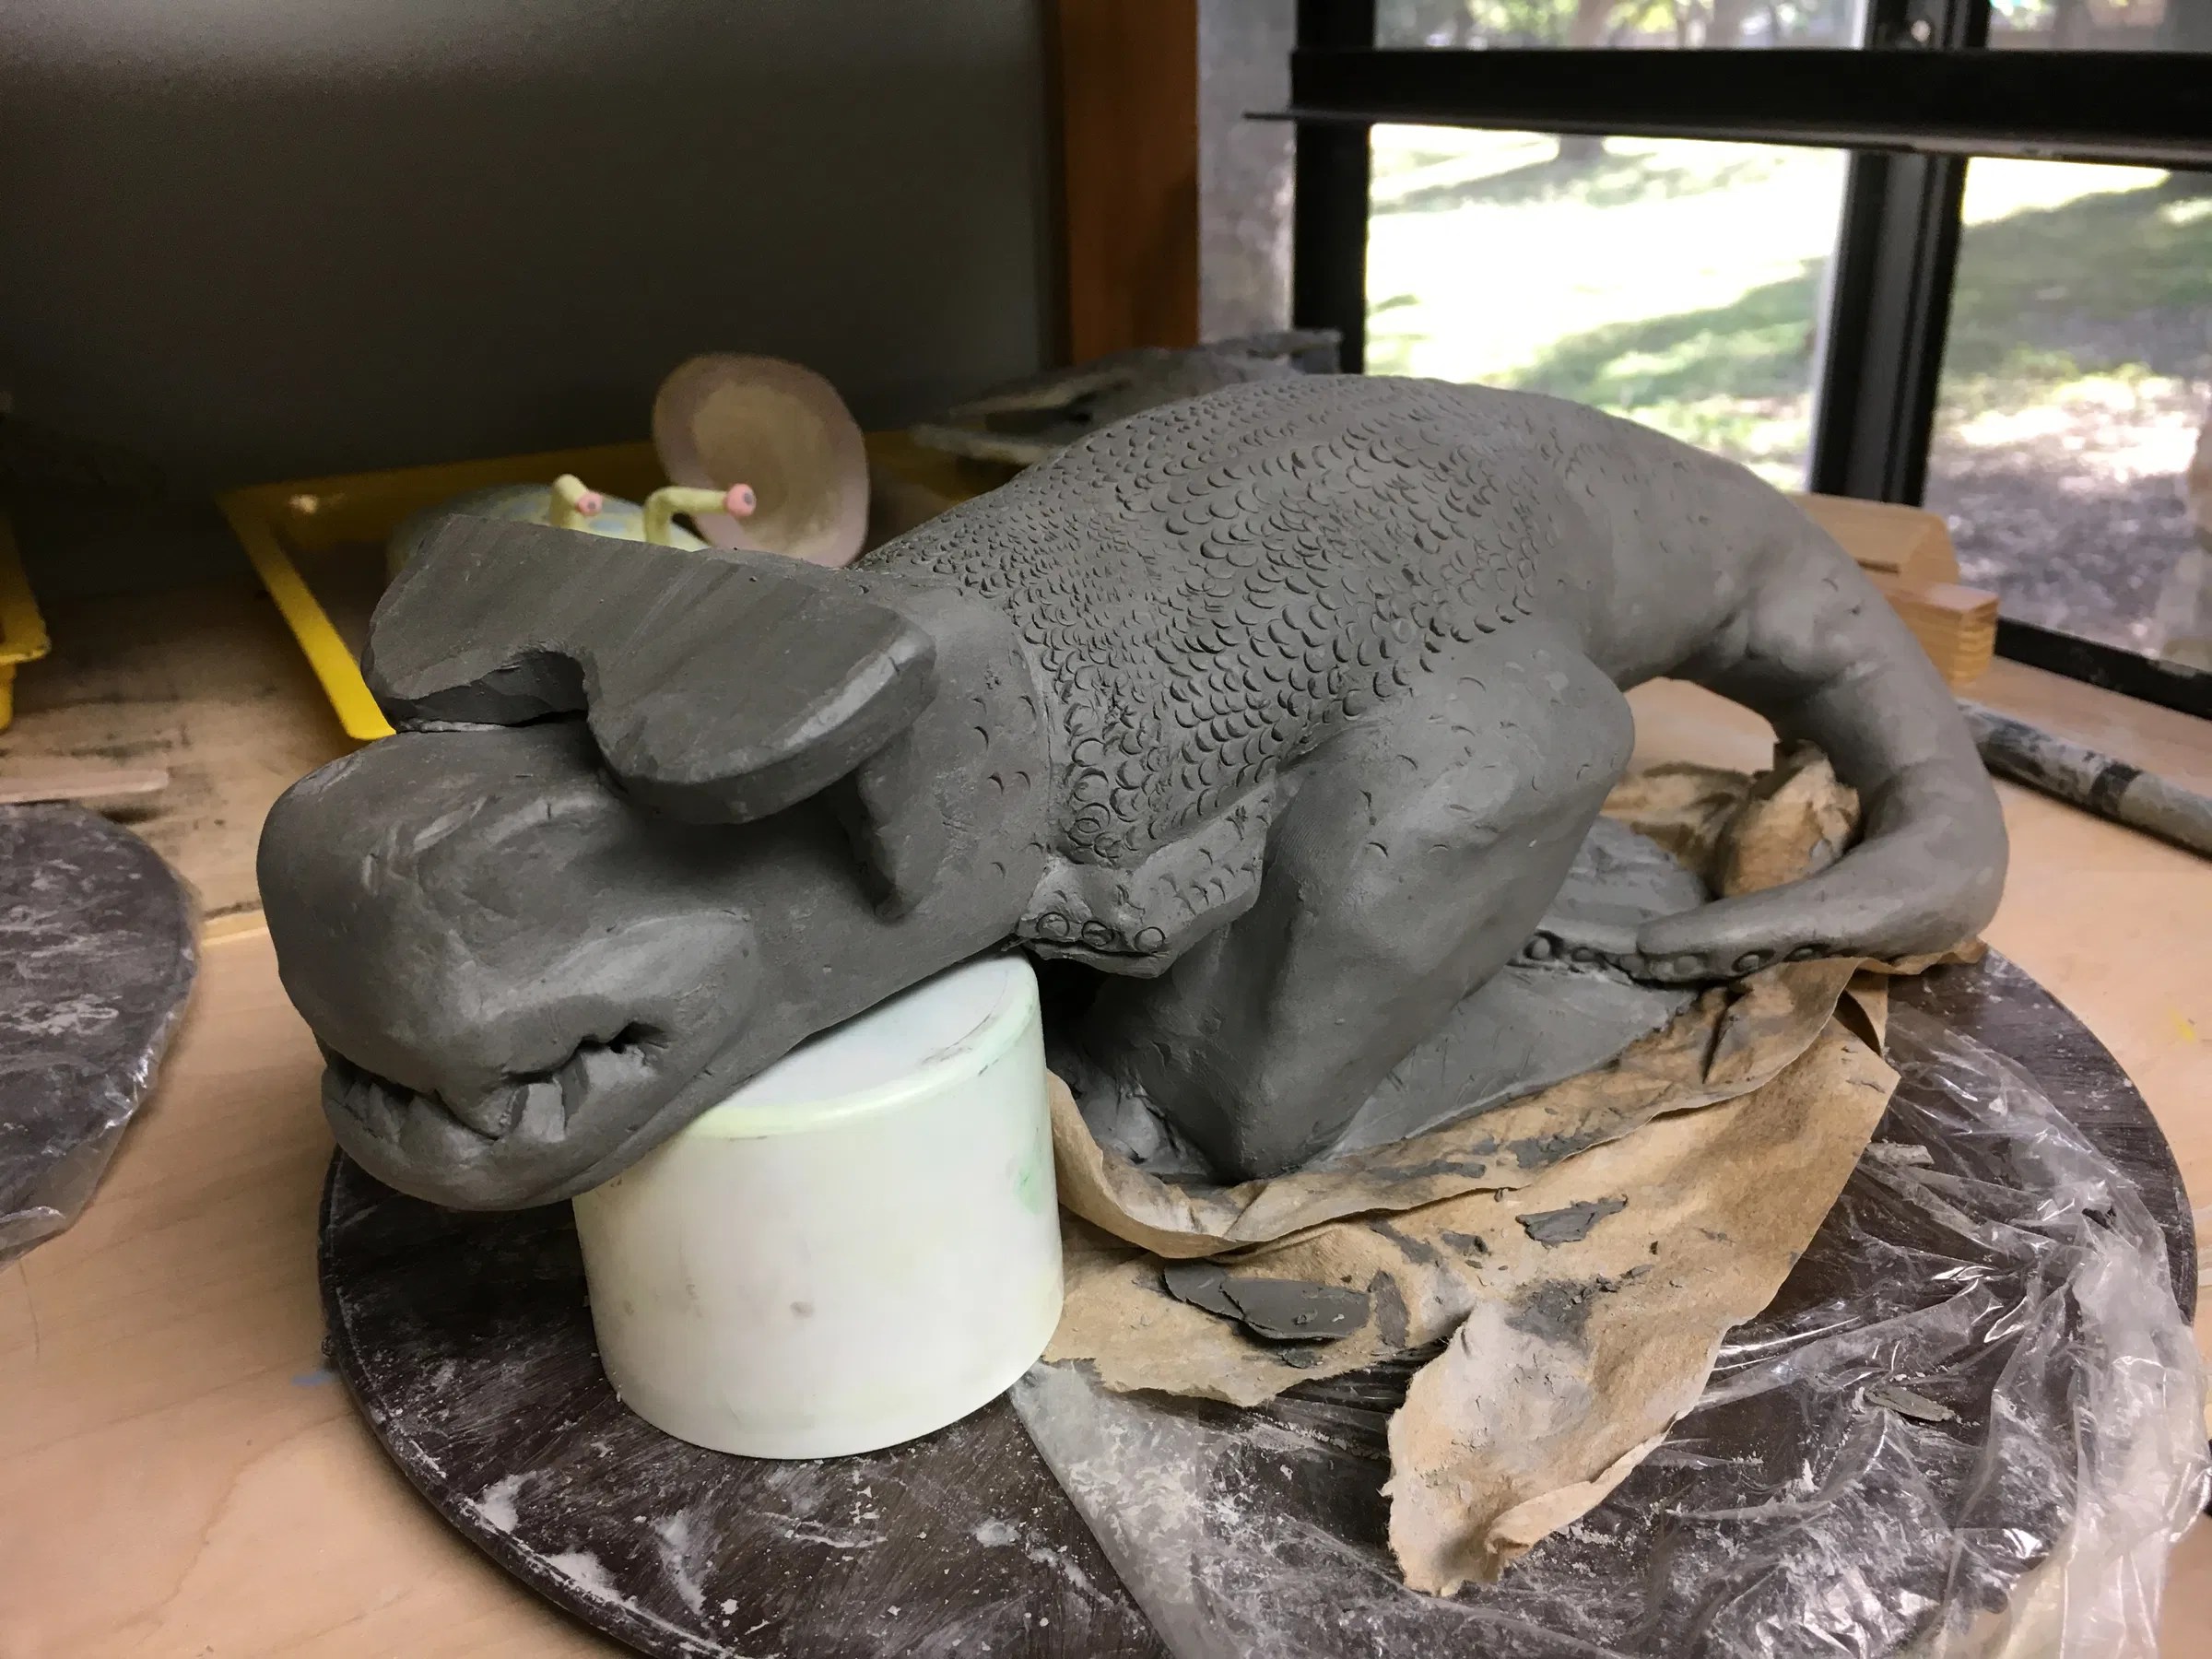
 The next step is to create the piece in 3D using clay. So after a reminder lesson on ceramics, we dove in & the students created their sculptures in ceramics (most of these were created by using pinch pots as a basic structure).
• Scratch/Score and slip – (DEMO) To attach two pieces of clay, scratch the surfaces to be joined several times with a needle tool and apply a small amount of slip or water on both sides. Press the surfaces together. Be sure not to over-wet the clay, which will cause it to become too soft and slimy. This is important to do because as slabs dry they tend to pull apart and pieces could pop apart or off. To make an even stronger bond, roll a very thin coil of clay and push it inside the joints where the walls meet.
• Use Subtractive and Additive methods to sculpt details in the clay.
• When completely finished, scratch your name into the piece & set on a bat labeled with your name & today’s date in Kiln room to dry. Dry 5-7 days
• Bisque: The term bisque refers to ceramic ware that has been fired once without glaze.
Activity 4: Glaze
 Glazing – Applying liquid glazes to the ceramic pieces. Glazes are made from finely ground glass suspended in a liquid. When fired again in the kiln, the glaze becomes a glassy coating which fuses to the surface.
Glaze Firing – Firing done after glaze has been applied to bisque or (occasionally) greenware to produce a glass-like surface.
Apply 3+ coats of glaze to bisque ware sculptures
Evaluation:
Construction/Assembly: Did the student choose and use the proper method of construction that would work best for their animal? Is the basic structure of the animal formed properly? Do the walls have a consistent 1/4″ thickness throughout. Is the creatures feature properly joined together using the score and slip method. There are no visible signs of assemblage. All incisions are neat and smoothed out. Structure stands balanced without external aids. Trapped air is properly vented.
 If you choose to use this lesson or to repost it (written or photo), please link it back to my blog. I, Michelle C. East, am the author of this lesson. Create Art with ME
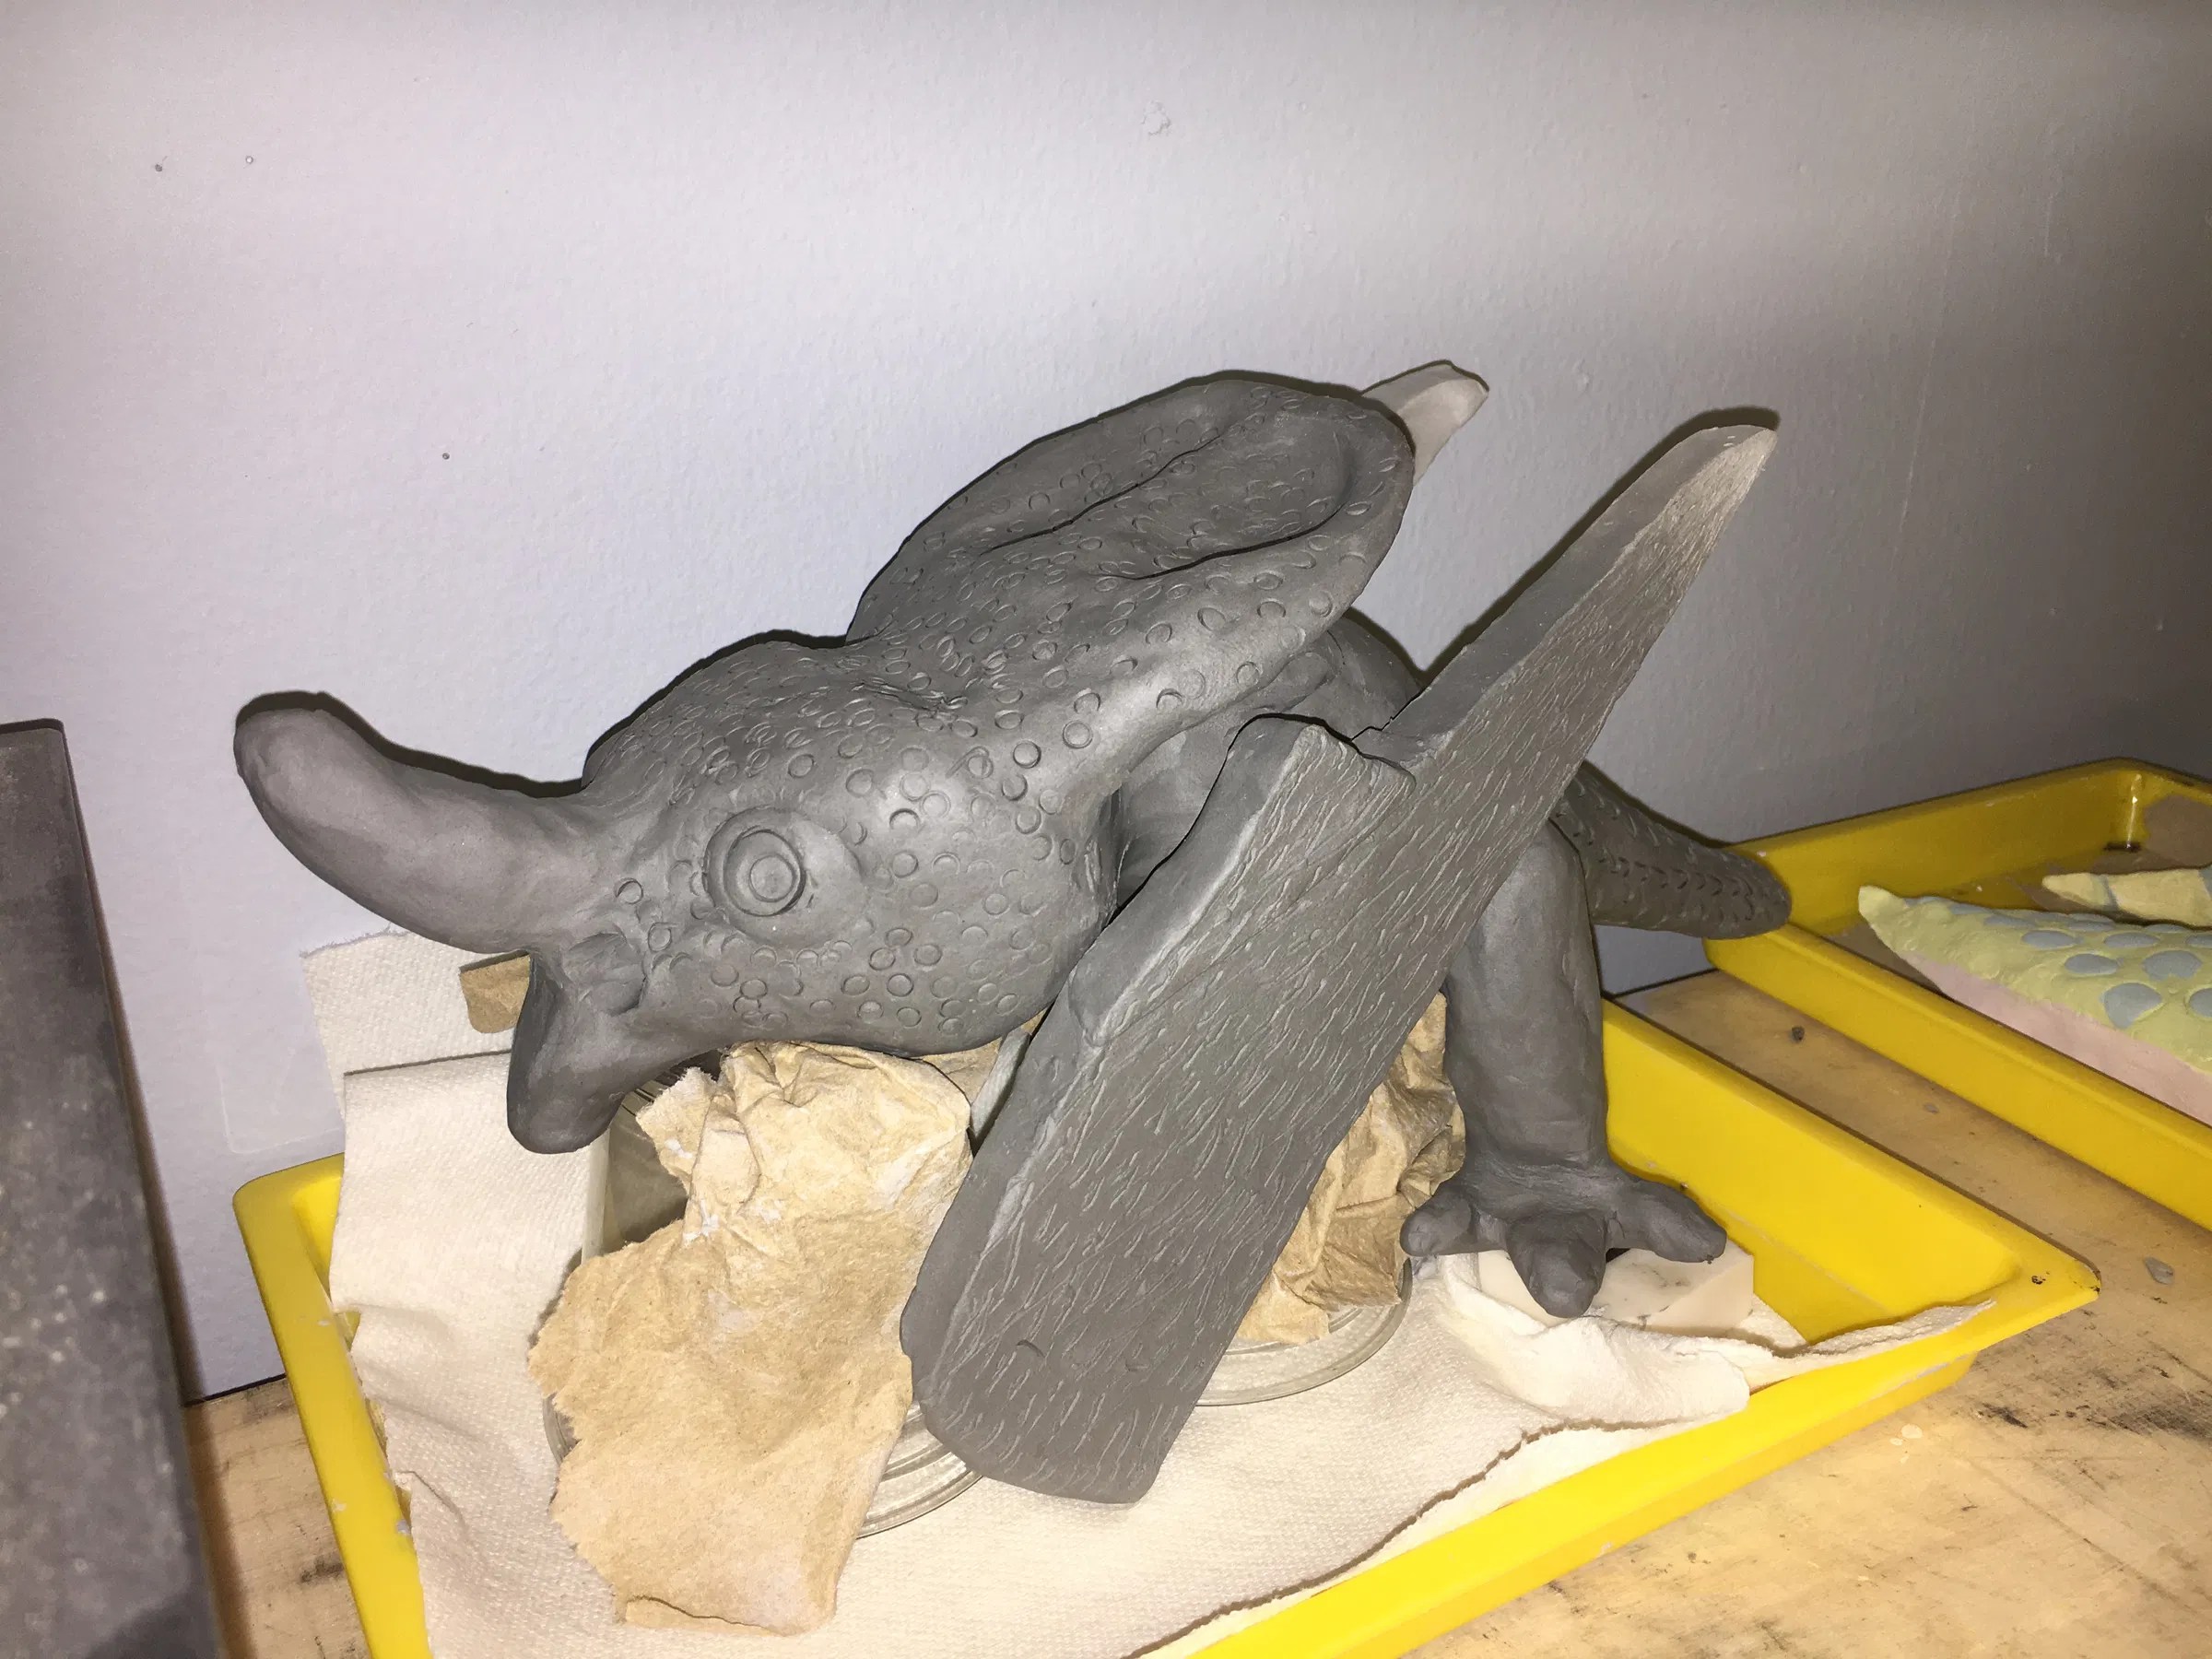
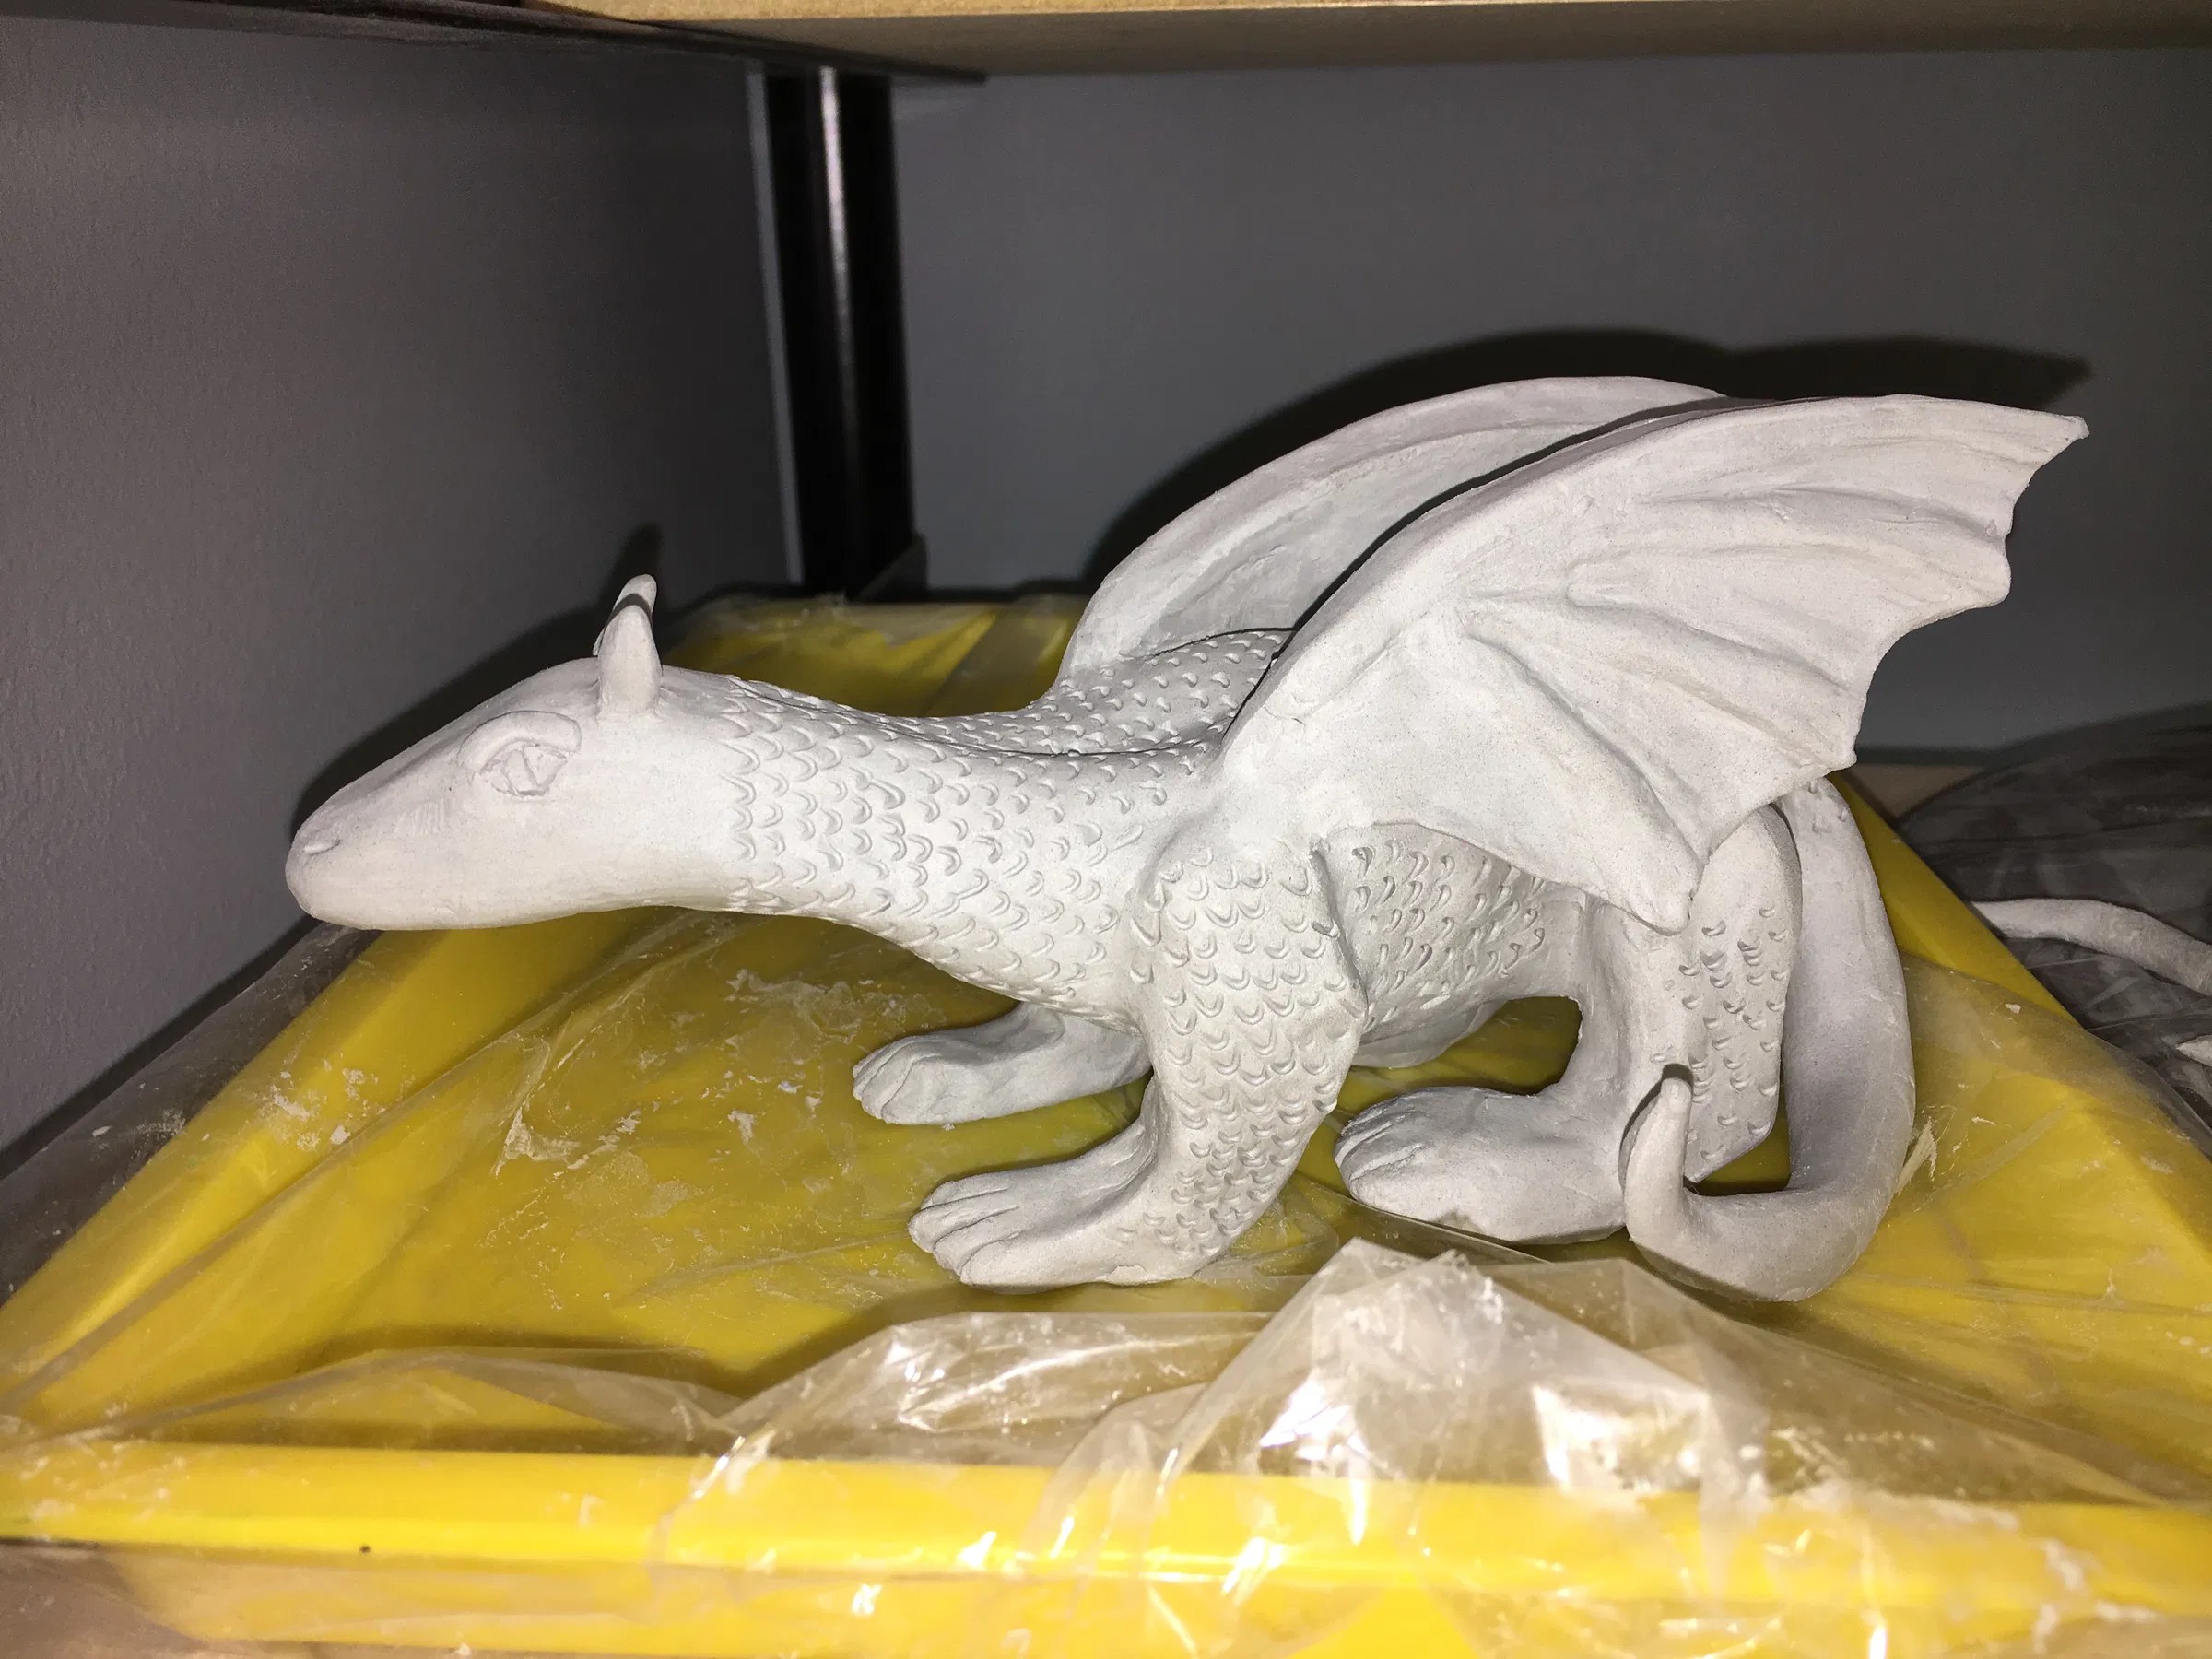
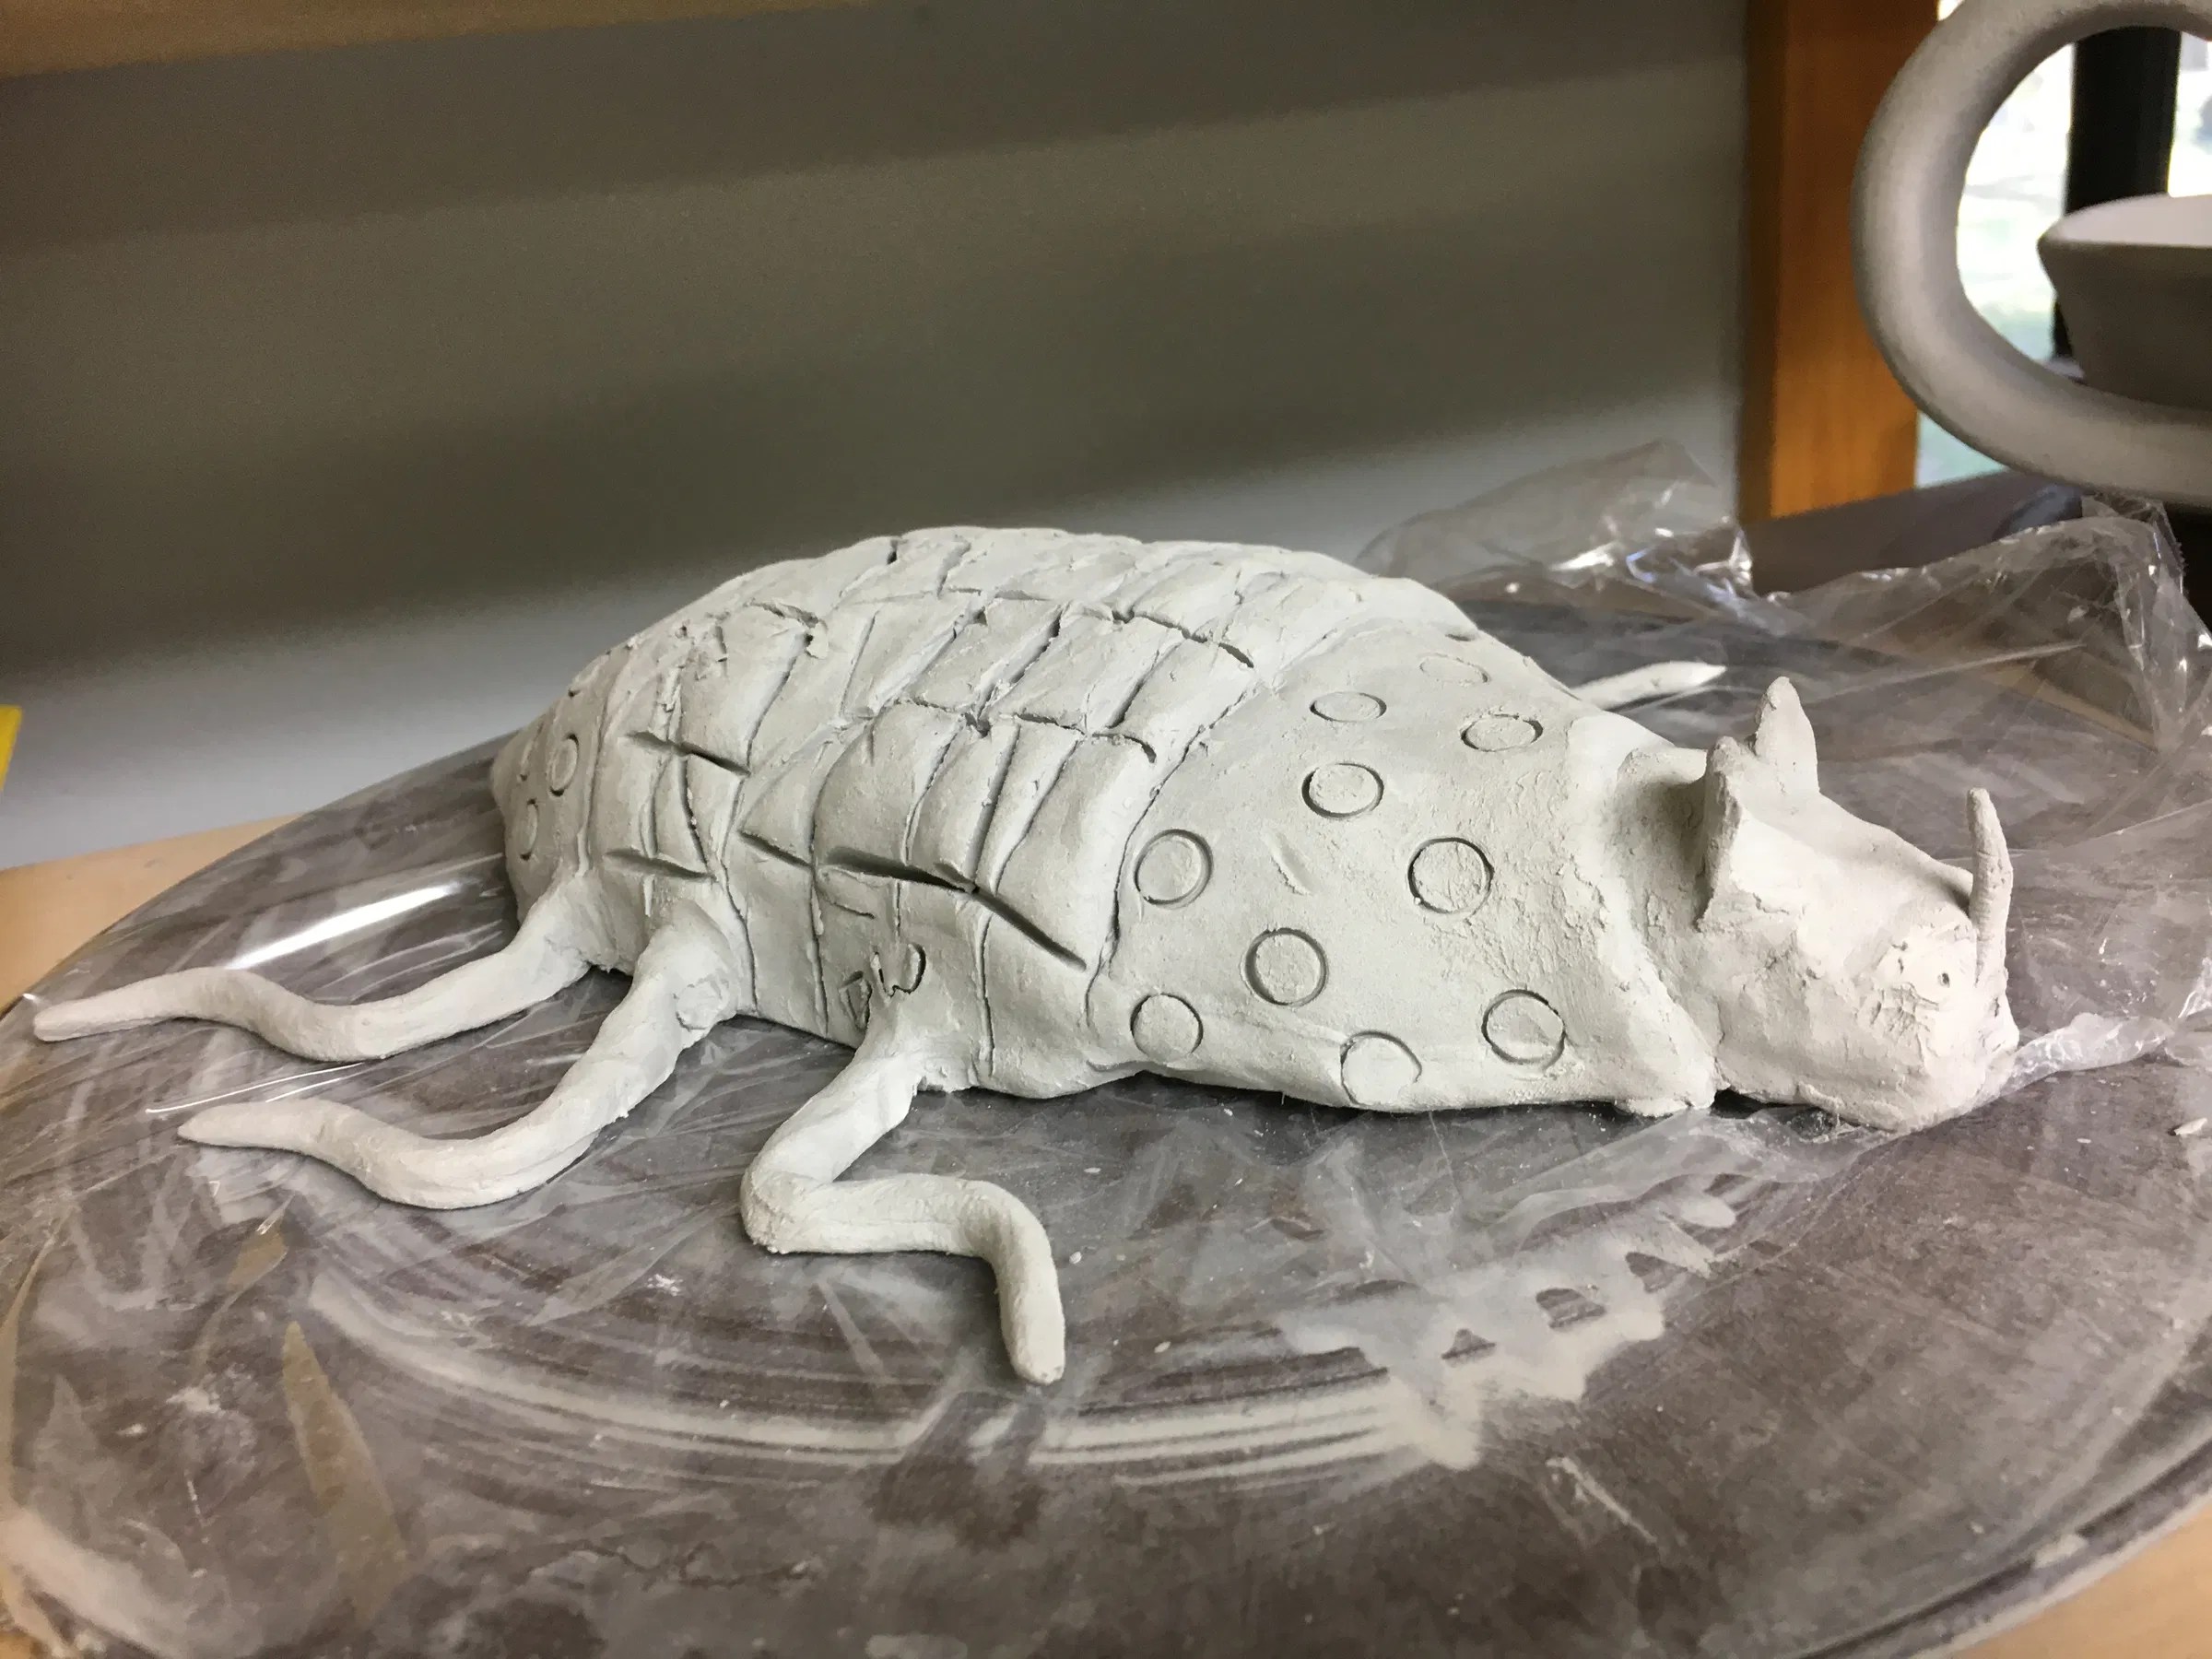
NEW Student Work 2016-Works in Progress!
Student Work 2012


Additional MS & HS Ceramics Lessons:
Ceramic Fairy Houses Lesson (Part One-Slab Construction)
Ceramic Fairy Houses Lesson (Part Two-Glazing)
If you choose to use this lesson or to repost it, please link it back to my blog. Create Art with ME


