
DIY Paintbrush Hall Pass Sign
 This summer I received a new classroom after being in my previous room for 11 years! What a blessing!! My new room is MUCH bigger, has fresh paint, new tile, & a better projector!
The new room has prompted new decor and color scheme. I found several ideas for art signs & hall passes on Pinterest (Links after the instructions) that I combined from to make my own sign. The sign I made was SUPER easy to make & was finished in about an hour (with drying time in the Texas heat!).
Here’s how I made my Paintbrush Hall Pass Sign:
Materials: teacup hooks, wood picture frame ($5 @ Hobby Lobby), black spray paint (can cover metal), cheap paintbrushes, craft paint= Total cost about $10 (I did have some supplies already)

Instructions:
1. Lightly sand & paint wood frame desired color.
2. Paint teacup hooks with metal accepting spray paint. Let dry.
3. Use needle nose plyers to open up the hook more.
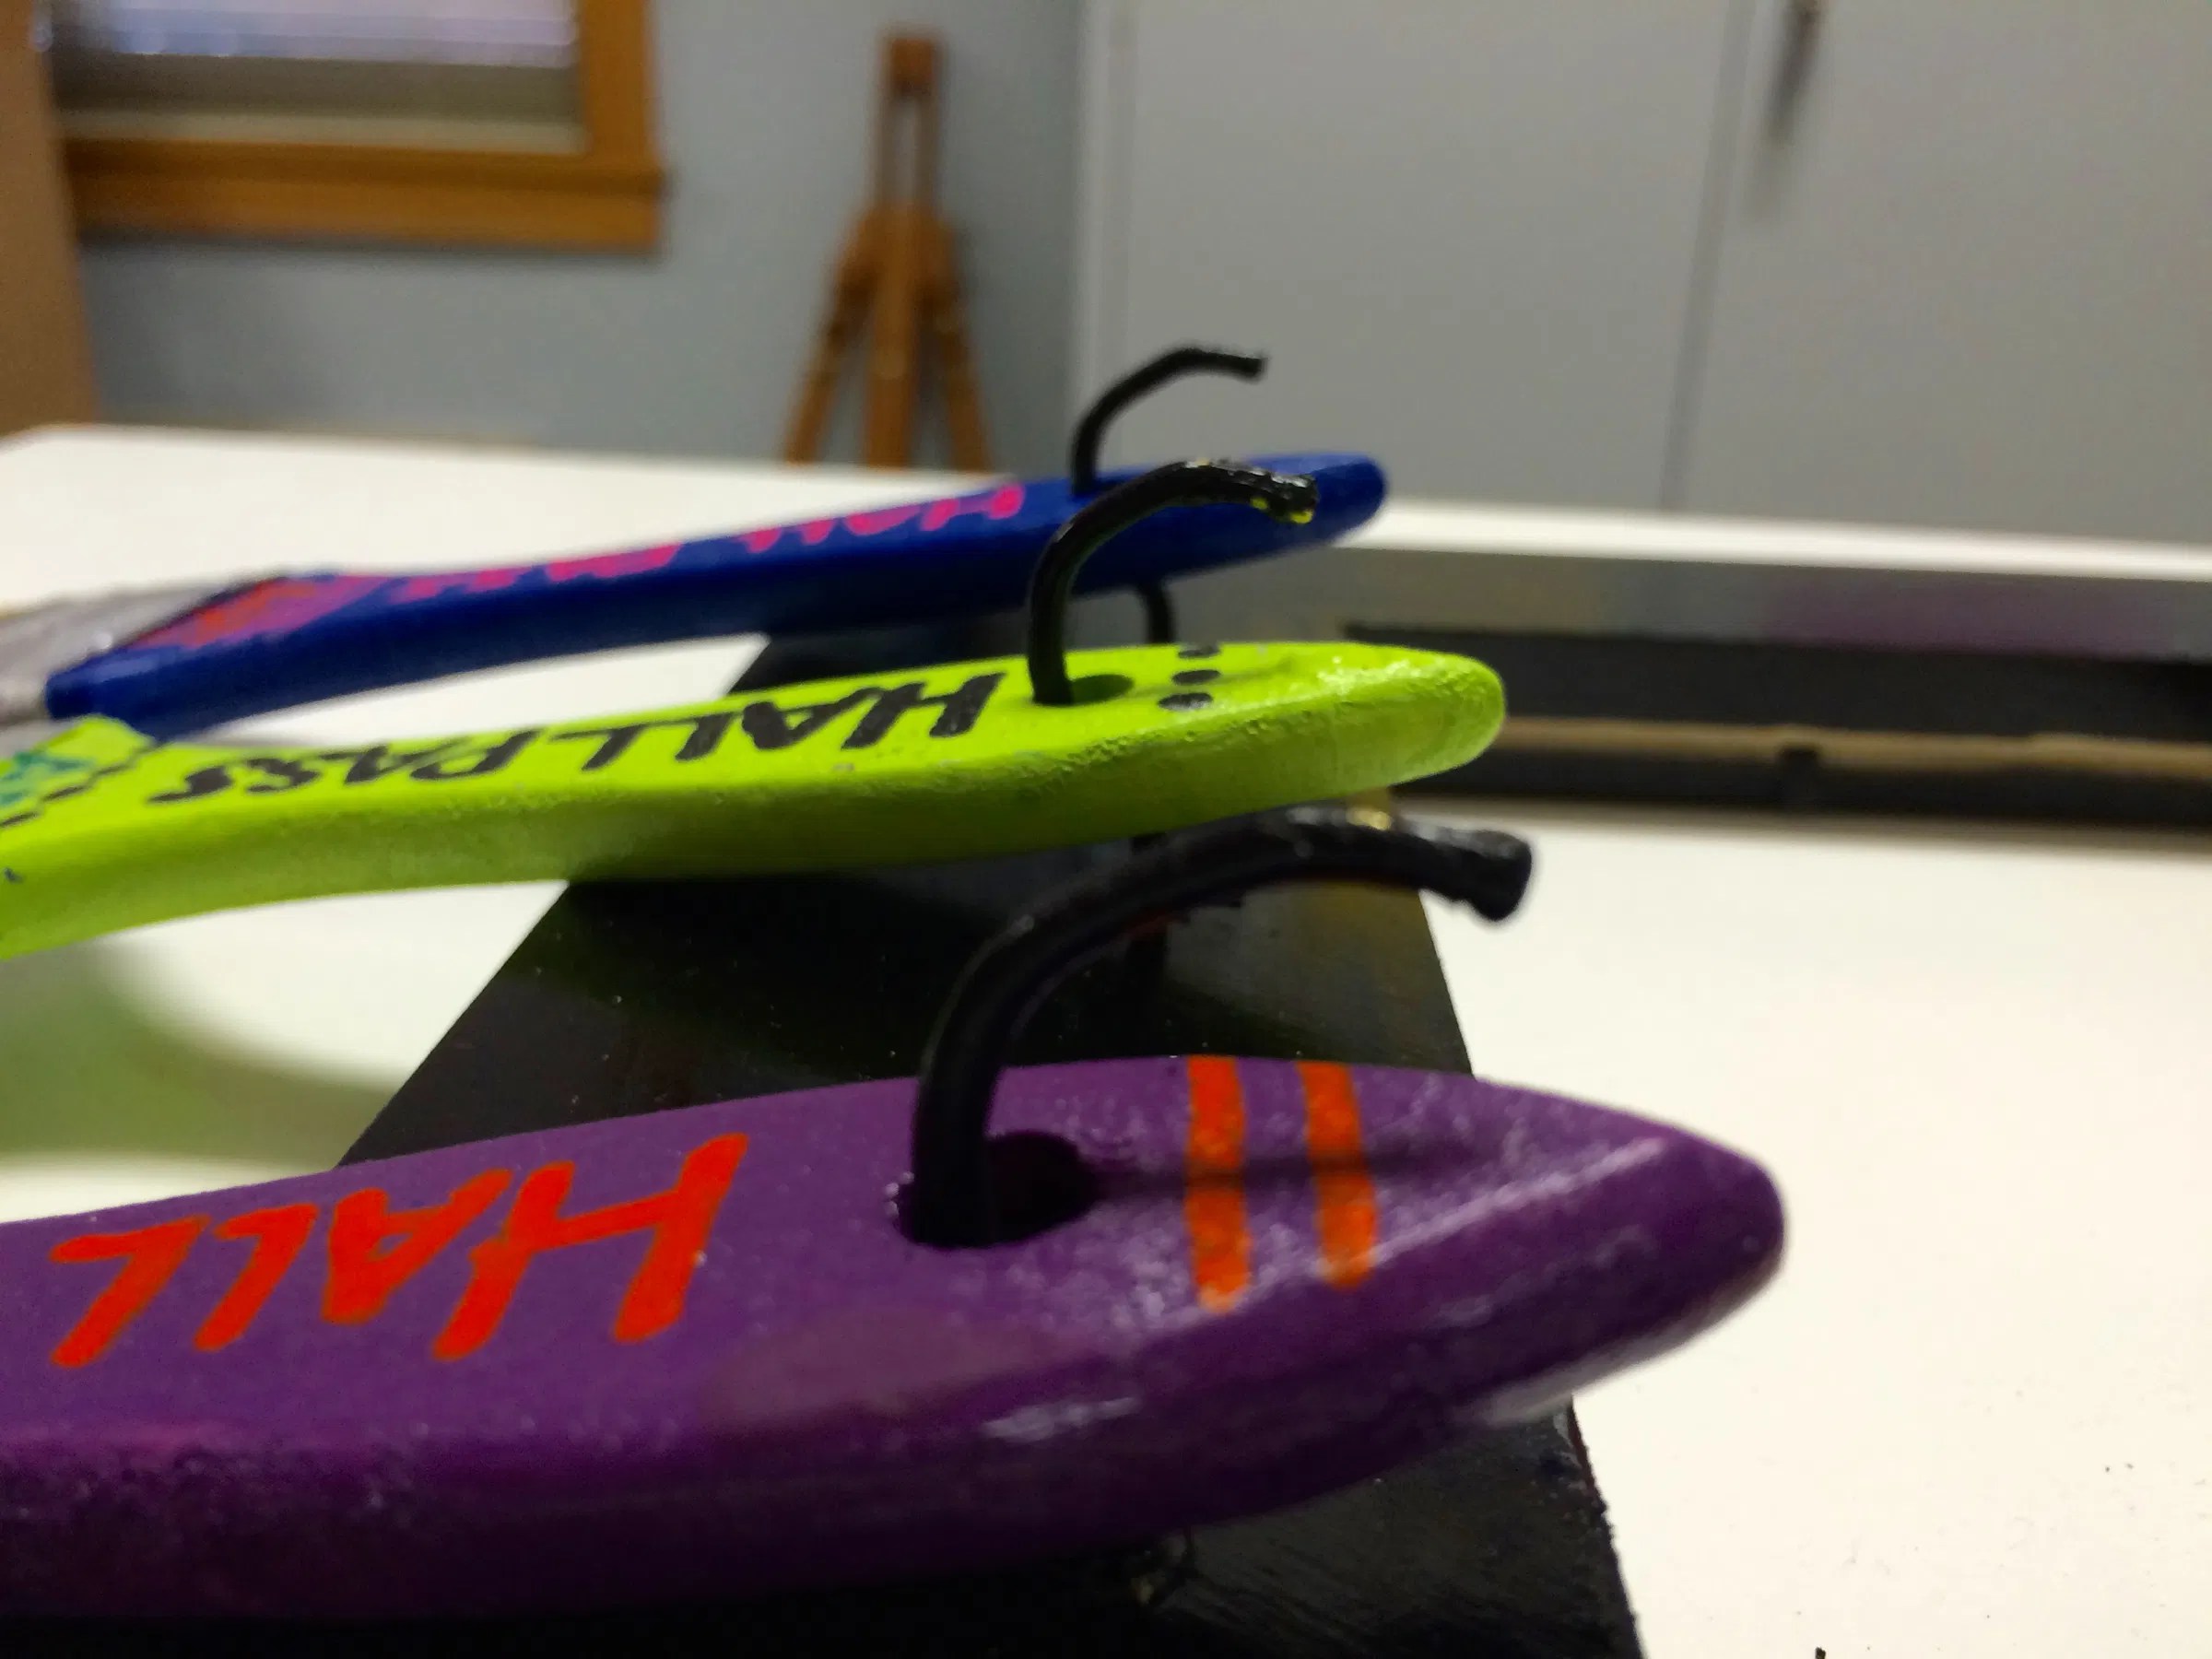
4. Use craft paint to color the paint brushes.

5. Make & Print out a “catchy” sign for your hall passes, like “going somewhere?” Place in the frame.
6. Attach a hanger to the back of the frame.

Additional Pinterest Ideas:
Ninja Arts Paint brush Hall Passes
If you choose to use any part of this post (written or photos) please link back to my blog Create Art with ME.


