
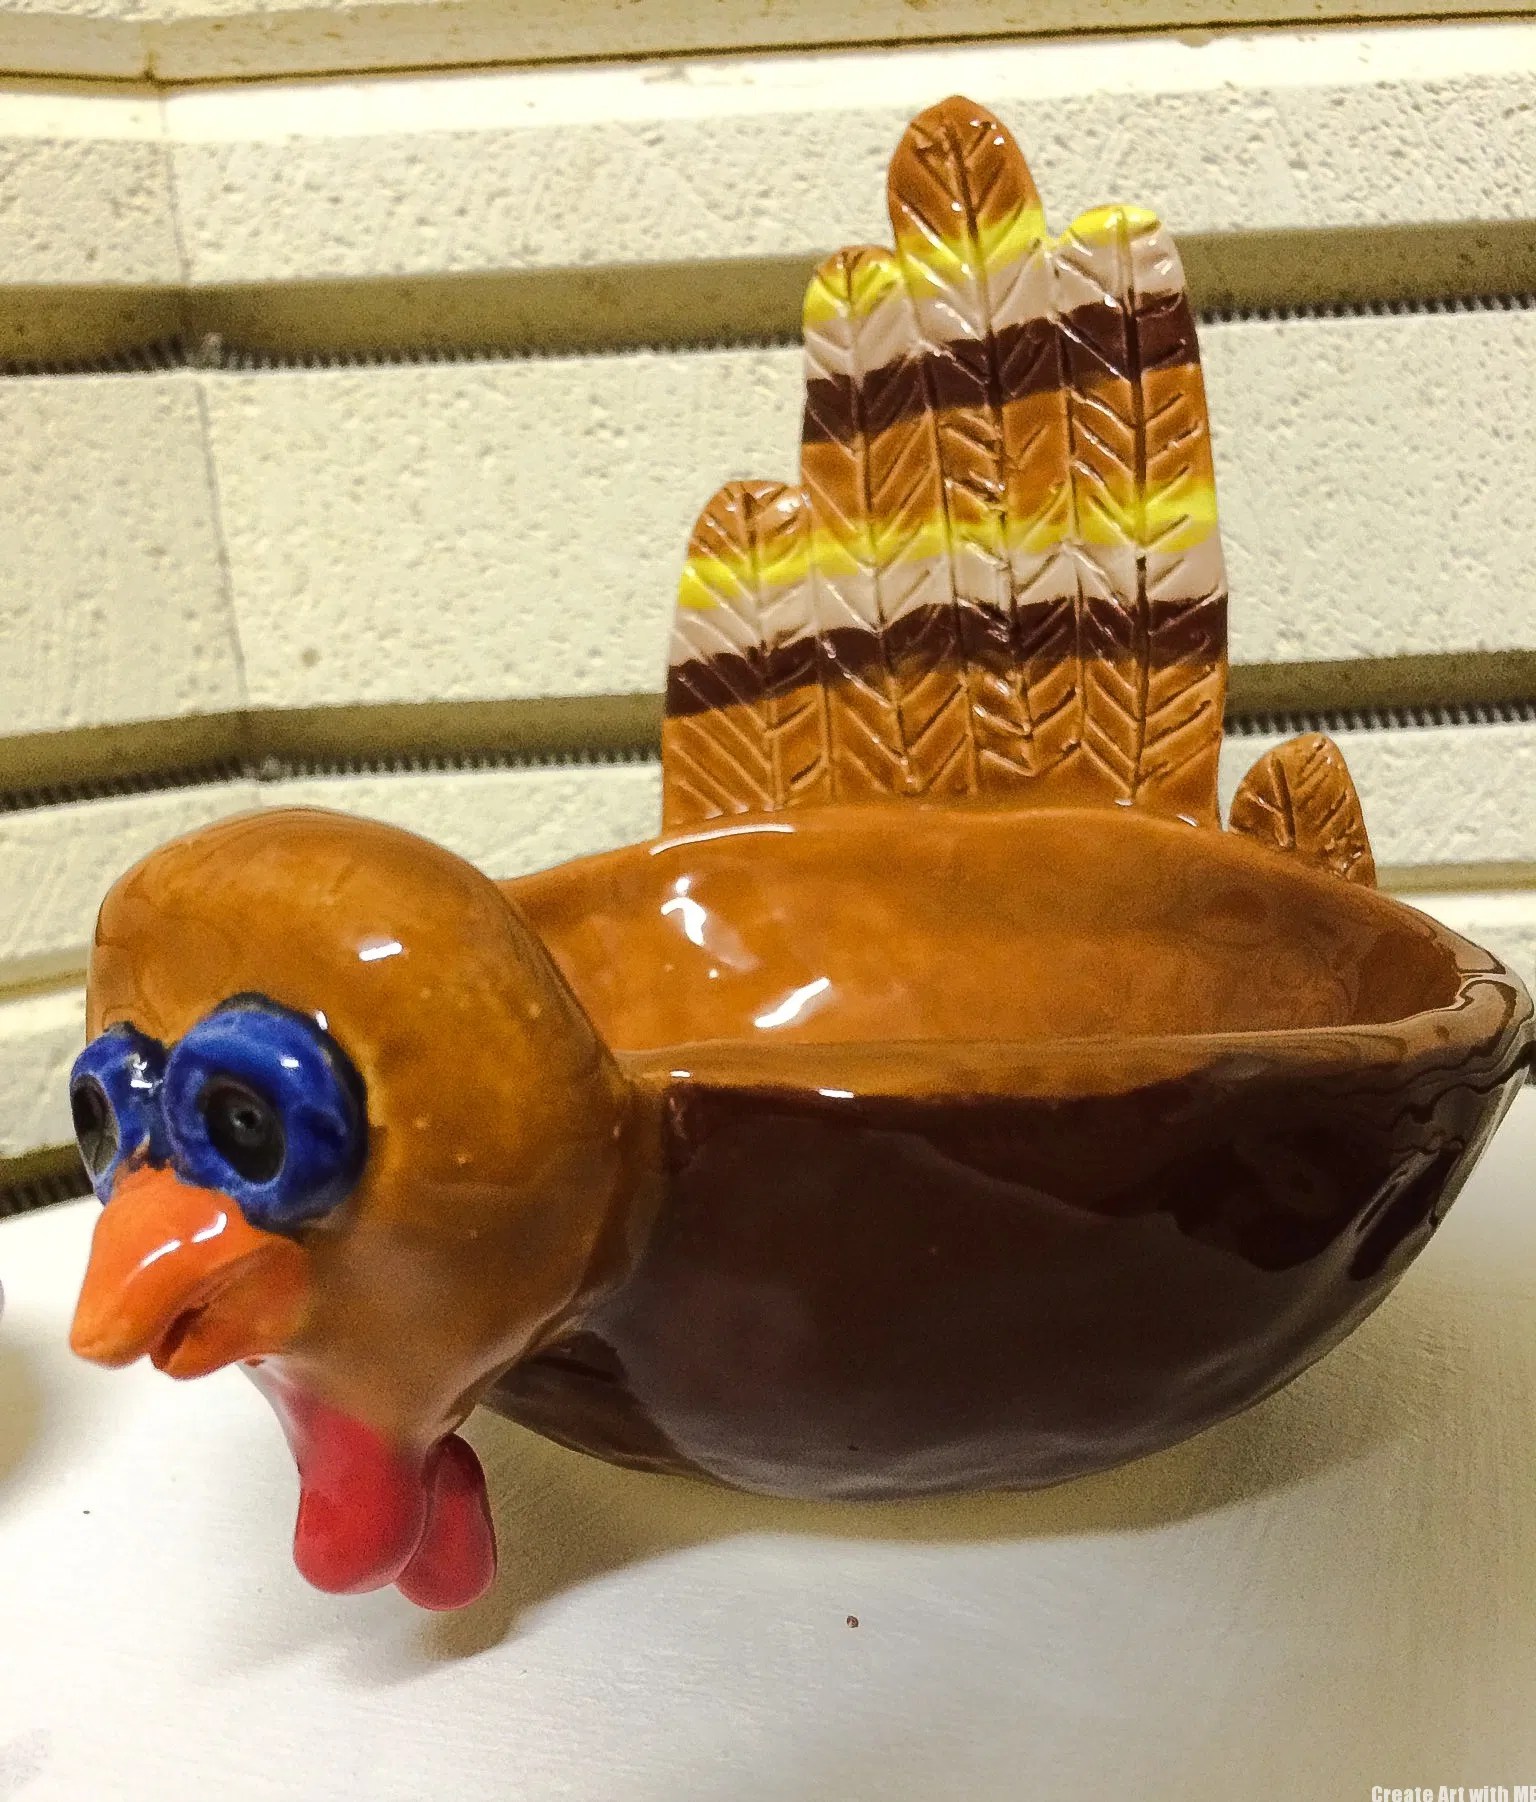
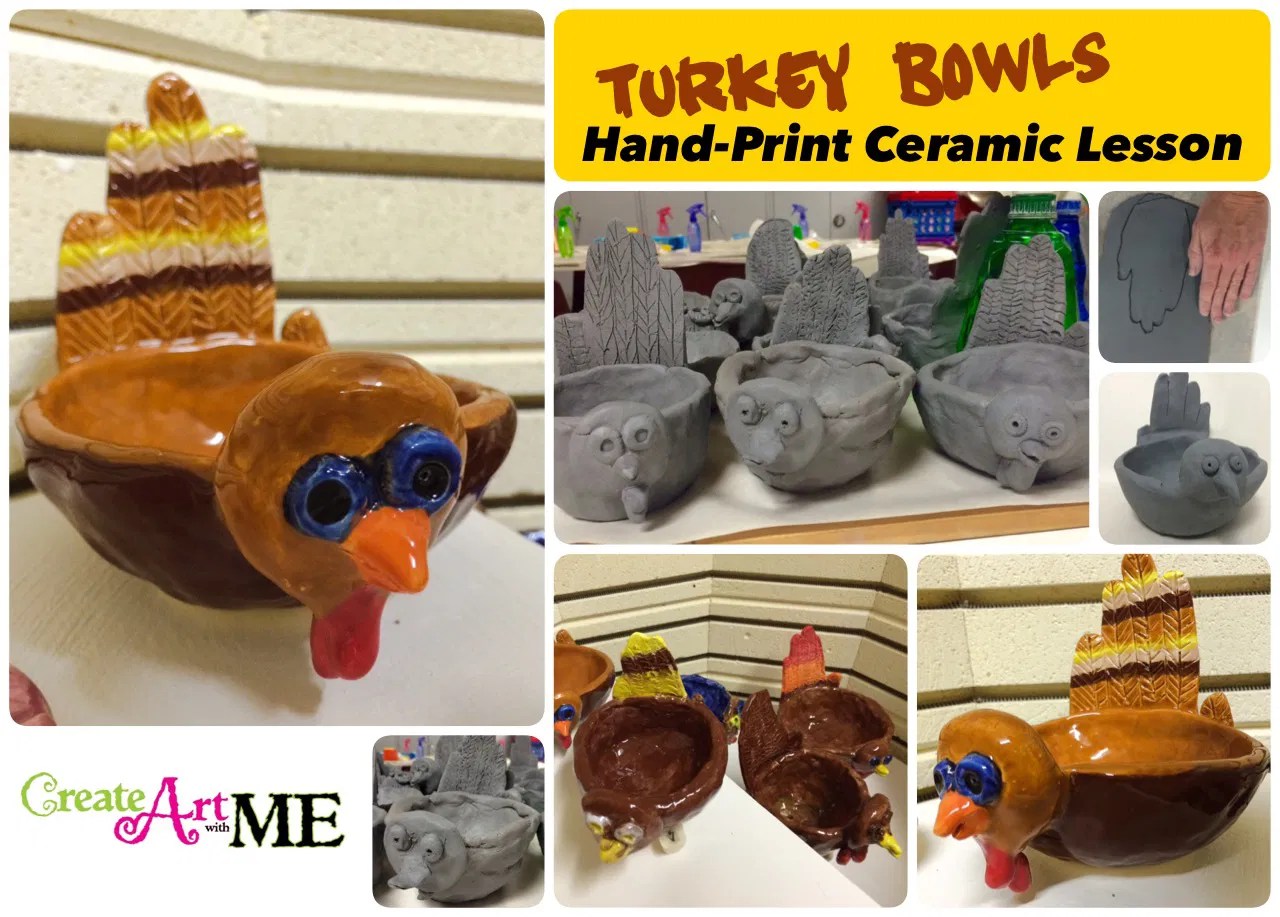
Ceramic Turkey and Hand-Print Pinch Pot Lesson
 Ceramic Turkey and Hand-print Pinch Pot Lesson is a clay art lesson that is targeted to elementary (2nd-5th grade) and teaches both slab & pinch pot techniques. You could adapted this to slightly older students by adding more detail & feathers to the turkey (6th+).
I wanted a fun & positive fall themed clay project that the children could use through the fall season. We created this project successfully in my After School Art Class that has Kinder-5th graders enrolled (young children needed lots of help with the pinch pot and attaching the handprint).
More pictures of the GLAZED turkeys at the bottom of the post!
 Supplies: Low fire clay, food safe glazes, clay modeling tools
Preparation: Roll a slab (big enough for a child’s hand), a 2″ ball (bowl), a 1″ ball (head), a small bit of extra clay (eyes, beak, & snood)-put in a gallon zip lock bag for each student
Delivery:
- Ceramic Process: build ceramic artwork, let dry completely for 5-7 days (until Bone dry), fire in kiln (Bisqueware), glaze with ceramic glazes, fire again (Glaze Firing)
- Ceramics Vocabulary:
- Slab: Creating a ceramic form by hand-building walls using flat rolled-out pieces of clay.
- Slip: muddy, liquid clay used to attach two pieces
-
Score: to make marks on the clay to attach two pieces
Hand-Print Feathers
- Give each student a slab of clay.
- KEEPING FINGERS TOGETHER, trace around the outline of the hand (don’t go in between the fingers!!).
- Remove extra clay from around the hand-print.
- Dip finger in water and smooth out all the edges.
- Using a needle tool. LIGHTLY draw in wear the finger lines would be. Do NOT go all the way through the clay.
- In each finger LIGHTLY draw in feather lines.
- Set aside to stiffen while you work on the bowl & head. If you are doing this in 2 class periods, then put this away until the next class.


Bowl
- Pinch Pot Method (Teacher Guided Demo)
- Give each student a ball of clay about 2” in diameter.
- Demonstrate how to create a pinch pot:
- Roll the moist clay ball in your hands to form a ball.
- Dip you thumb in water and stick it into the middle of the ball about 1/2 way down.
- Hold the clay ball with your left hand if you are right-handed or with your right hand if you are left-handed.
- Insert your dominant hand’s thumb into the hole and wrap your four remaining fingers over the top of the clay ball (The teacher may refer to this step as “puppet hand-Kermit the frog” for young students.). Keep these fingers together and GENTLY pinch with your thumb on the inside of the hole towards your fingers. This will make the interior wall of the clay ball thinner as you gently turn the ball while pinching slowly. (like Kermit is talking)
- If you start to get elephant skin (small crack or splits in the clay), the dip your finger in water then rub your finger back & forth over the crack until it is smoothed out.
- Continue to pinch and turn until your ball looks more like a pot.
- Once the walls of the pot are an even thickness, (approx. the thickness of your pinky finger) shape the bottom of your pot by gently tapping it on your desktop to form a flat surface.


Turkey Head
- Give each student a small ball- about the diameter of a quarter or slightly larger.
- Have them roll it around in their palms to make sure its round
- Give them another small amount of clay for the eyes and the beak (optional: add a wattle-that dangly thing under the turkey’s beak)
- Roll the eyes into small balls and form the beak (like a triangle).
- The wattle is 2 tear drop shapes attached under the chin.


Putting It All Together
- You may need to trim off the bottom of the hand-print before attaching it to the bow.
- Use the Score & Slip Technique to attach the hand-print on the back of the bowl and then add the turkey head, eyes, beak & snood on the other side of the bowl.
- Score and Slip Technique: Teacher DEMO Score and slip refers to a method of joining two pieces of clay together. First, score the clay; this means that you make scratches in the surfaces that will be sticking together. Then you slip it; that is you wet the surface with some slip, using it like glue. Next, you press the two pieces together. It is very important to always score and slip
- You may also need to prop up the feathers to keep them upright as they dry.


Student Artwork:


If you choose to use any of this lesson (written or photos), please link back to this blog Create Art with ME!
Other Elementary Ceramic Projects
 Lilypad & Lotus Flower Ceramics Lesson
 Miniature Ceramic Bird Bath – Pinch Pot and Slab Lesson
 Ceramic Butterfly Bowls (Part 1) Slab Construction
Ceramic Butterfly Bowls – Glazed! (Part 2)
 Pinch Pot Creatures – Elementary Ceramics Lesson
Creative Ceramic Pinch Pot Ideas & Lessons


Great lesson! Thank you. I am going to try this this week with my elementary Ceramics students. They were asking if we could make Turkeys and this lesson is so cute.
These are absolutely adorable! After 14 years in elementary ed, I am a first year art teacher and follow you faithfully! I’m wondering if you have any ideas on how to make the principles of design definitions more kid-friendly. I’m having a tough time explaining what I mean by balance, composition, etc. (Yes, I realize composition isn’t a principle, but still a tough one for my littles to understand).
Thanks,
Brooke
Hi Brooke! Welcome to the art teacher world-WAY different from a traditional classroom! I hope you are enjoying your new position-you are bringing so much teaching expertise into the art room! Teaching the principles of art to elementary is challenging. What I try to make sure to do is have LOTS of visual examples and discuss them as a class. I also don’t teach every principle to every grade. K-1 can pretty easily comprehend balance and the concept of visual movement (especially looking at Van gogh’s artwork for movement). Repetition & Rhythm are scaffolded-basic patterns in the younger grades and adding in the 5 types of rhythm as they get older. Is your school using a curriculum? I have Art Connections levels k-6 which helps with ages and introducing elements/principles. Hope that helps a little! Biggest thing is knowing what the kids can understand and providing visual examples with age appropriate explanations (which I usually have to write myself). -Michelle